


Hey friends! It surely has been a while since I posted on here with a food recipe! (Or I guess any recipe at all!) I can tell you much has changed since I've posted anything on either of my blogs...but I can do some catch up later. I try to sum up what's happened in the last two years in a few sentences. Mr.M and I left moved away from Idaho (I still miss it like crazy and think about it practically everyday) in spring of 2013 and moved into Brookings, SD where Mr.M began working towards the end of his college career as a mechanical engineering student. I got a job working in patient services at the Avera Medical Clinic and we learned that we were expecting our first baby in October 2013. Fast forward 9 months and we welcomed our little baby girl Emmie into this world on July 11,2014. It's now November of 2014 and we will be celebrating having Emmie in our lives for four months and Mr.M being almost done with his semester (only 3 more to go after this one!) and oh yeah, Thanksgiving! Well, so I don't ramble on too much about our lives... I happen to know we live so adventurously (ha!) that everyone wants to know about us... I will get to my recipe.
First let me tell you this. I am a lover of all things recipes. I love learning how to make things and make them myself. I love this for a couple reasons, first I love just creating and learning, and second, being on a very strict budget I have learned to make things at home and make the things we do have and do have to buy go as far as they can. I try not to waste anything that we have.
This is a freezer meatball recipe that I have learned and read and adapted it to be a little more financially friendly and cost effective for making a lot.
Family Friendly Freezer Meatballs
3 lbs ground beef (it doesn't really matter the fat content... I've used lean and I've used the 27% stuff and they both work great)
6 eggs
1 1/4 cup milk
1 1/2 cups (or 1 bag) of shredded parmesan cheese
1/8 - 1/4 cup (or less if you want) of minced garlic (we buy it in the jar because it's WAY easier and a little more affordable too.) or about 7-8 cloves
2 1/2 - 3 cups bread crumbs (depending on the how moist the mixture is)
2 onions cut really small (I use a mini chopper)
1 1/2 teaspoons of pepper
1 1/2 teaspoons of oregano
1/2 teaspoon of cajun seasoning (or season salt)
3 teaspoons of salt
Set oven to 350 degrees F. Mix everything together and make them into a little smaller than golf ball or cookie sized balls. We use a cookie scoop to form them and then I roll them a little better with my hands. Put them on a jelly roll pan (or cookie sheet or cake pan or basically anything that is metal and you can stick in an oven). You don't have to worry about them being too close because as they cook they will get smaller. Bake them for about 35-40 minutes. No need to worry about flipping them. Allow them to cool and then put them into your freezer bags! I usually put around 20 or so in a bag and then label it with how many they are and the use by date. Which I always say that it's best to use by 3 months by the day it was made. This usually makes anywhere between 84-96 meatballs. (I say that because I've done this twice and those are the two numbers I've gotten)
You can pretty much do whatever you'd like with these. We love them with spaghetti but we also love them as sweet and sour meatballs in the crock pot. If you are reheating them on the stove top just add a little bit of water and let them steam a bit to thaw and get warm. If you are reheating them in the crock pot you can go ahead and put them in frozen and they will heat as everything cooks. I'm not sure how they thaw in the microwave because I've never done it.
Happy Eating Everyone! :)
Oh yeah, I adapted this recipe from one I found right here.
Monday, November 10, 2014
Monday, November 12, 2012
Parmesan Honey Garlic Pork Chops

PS. The smell of this cooking in your crock-pot is amazing!!!!
Parmesan Honey Garlic Pork Chops
Recipe adapted from Six Sister's Stuff
Source : Six Sister's Stuff
 4 thinly sliced pork chops (maybe 1/2 lb?)
1/3 cup grated parmesan cheese from the can
1/4 cup honey
1 1/2 tablespoons soy sauce
1 tablespoon dried basil
1 tablespoon minced garlic
1 tablespoon olive oil
1/4 teaspoon salt
Spray crock-pot with non-stick cooking spray. Place your pork chops in the crock-pot. Combine the rest of the ingredients in a bowl and whisk them together. Pour the sauce over the pork chops and let it slow cook for at least 5 hours. We cooked ours for about 6 hours and it was fine.
You can get the original recipe here.

 |
| I always like spraying my measuring up with non-stick spray before pouring sticky honey into it. The spray makes the honey effortless pour out of the measuring cup! |
 |
| Sauce ingredients pre-mixing. |
 |
| Sauce ingredients post mixing. |
 |
| Sauce poured over pork and ready to cook all afternoon. :) |
 |
| What's that? Yummy pork! |
Sunday, November 11, 2012
Shirley J Brownies with Delicious Frosting
 Mr. M loves brownies... and he always wants me to make them for him. Well, we went to a craft fair and he tasted what he thought was one of the best brownie creations he had ever eaten. We didn't really do anything about it because the mix was rather spendy... ($14.99 to make three 9x13 pans of brownies). Then.. this past weekend we went to another craft fair and can you guess what we bought? Yup, the Shirley J Brownie Mix because Mr. M was smitten by their chocolatey goodness. I was smitten by how incredibly easy they are!
This is all I had to do:
Shirley J Fudge Brownies
(I only made half of a recipe, which made an 8x8 pan)
1 3/4 cup Shirley J Brownie Mix
1/2 cup of water
I put in in my KitchenAid and mixed it for about 2 minutes. I then spread it into a greased 8x8 baking pan, baked them at about 375 degrees (our oven's temperature is very off) for 12 minutes and they were done!

I actually made homemade frosting to go with them. It's the recipe directly from the Hershey's Cocoa container.
Hershey's "Perfectly Chocolate"TM Chocolate Frosting
(I halved this recipe too.. but this is the full recipe)1 stick (1/2 cup) butter or margarine
2/3 cup Hershey's Cocoa (I used the store brand)
3 cups powdered sugar
1/3 cup milk
1 tsp vanilla extract
Melt butter. Stir in cocoa.
Alternately add powdered sugar and milk, beating on medium speed to spreading consistency. Add more milk if needed. Stir in vanilla. Makes about 2 cups.

Happy Baking!!
PS. You can order Shirley J products here.
Saturday, November 10, 2012
1 hour Dinner Rolls!!!
 I stumbled open this wonderful recipe when I was creating my Pinterest Recipe Binder. I gave it a try and these rolls are amazing! They are so simple too. Also, if I get the pleasure of dining with you during Thanksgiving this year, I will be bringing these tastey rolls with me.
I know there are a lot of people out there that are scared of using yeast. (My mom is one of them.) But this recipe is so effortless that there is nothing to be scared of. Seriously!
1 Hour Dinner Rolls
Recipe found here from What's on your menu this week?1 cup warm water
2 tablespoons active dry yeast (I use quick rise)
1/4 cup sugar
1/3 cup oil
1 teaspoon salt
1 egg beaten
3 1/3 cup flour
I use a KitchenAid when I make this recipe, but I'm sure you could use whatever gadget or method you need to mix everything together.

First mix the water, yeast, sugar, and oil into the bowl. You'll want to let this mixture sit for about 15 minutes to activate the yeast. It will be bubble and smell like bread. And look like this:

While you are waiting, you can go ahead and mix the beaten egg and the salt.
Add the egg/salt mixture to the yeast mixture once the waiting is over. Then start adding the flour. You'll want to add this a little at a time. The dough may be sticky, but you can go ahead and add enough flour so you can handle it. After you have added enough flour let the mixture rest another 10 minutes.


 |
| I think I added a little bit too much flour. There was still some left on the bottom of the bowl. Oh well! |
After it's done resting it's finally time to make your rolls! I usually get around 12 rolls from this recipe, but we like our rolls big. Spray your hands with non-stick cooking spray before you work with the dough to make it easier to work with. I learned a fun trick from the lunch ladies at the school I work at. Squeeze the dough through your hand to make a perfect dough ball. It's hard to explain, but hopefully the pictures will help. Put the dough balls onto a greased cookie sheet so they are not touching.


Once you are done forming the rolls, let them rest again. This time for 20 minutes. I usually put a flour sack towel on top so they don't dry out.

When it finally comes time to bake. Bake them in a 375 degree oven for 10 minutes, or until done. We usually butter the tops when they are fresh out of the oven so they stay soft.

You will not be disappointed! Enjoy your rolls! :)

Slow Cooker Chicken Cordon Bleu
 Mr. M loves chicken cordon bleu. I happen to enjoy it as well. But, it takes a lot of time and patience to make the classic chicken cordon bleu recipe. I.. I am a very impatient person, and I really like simple and tastey recipes so I have found a couple lazy,yet delicious, ways to make chicken cordon bleu for our family. One is in casserole form, which is super easy and way yummy(I'll post that recipe later), and the other is this beauty that I conveniently get to make in my crock-pot. This was the first time making this and I adapted my recipe from one I found at Six Sister's Stuff. It was great! Both Mr. M and I had seconds... and there's enough to eat for lunch tomorrow!
Slow Cooker Chicken Cordon Bleu
Recipe adapted this recipe found on Six Sister's Stuff1 chicken breast cut into pieces
1 can cream of chicken soup
1 cup milk
1/2 package of dry herb flavored stuffing mix
4 ounces of ham (I just used a package of sliced ham, it had 2 thick slices in it)
4 ounces of swiss cheese (I added a little aged cheddar because we needed to use it, which probably made the cheese count a little higher, but who complains about too much cheese?)
1/4 cup butter, melted
Spray your crock-pot with non-stick cooking spray. Mix together the cream of chicken soup and milk in a small bowl. Pour enough of the soup into the crock-pot to cover the bottom. Place the chicken pieces into the soup mixture. Layer the cheese and the ham in the crock-pot. Next, pour the rest of the soup over the ham and cheese. Make sure it is well distributed. Sprinkle half a box of stuffing on top. Drizzle the butter over the stuffing. Cover your crock-pot and cook on low for 4 to 6 hours or for 2-3 hours on high.
Enjoy and Happy Crocking! :)
 |
| Mix the soup with 1 cup milk. |
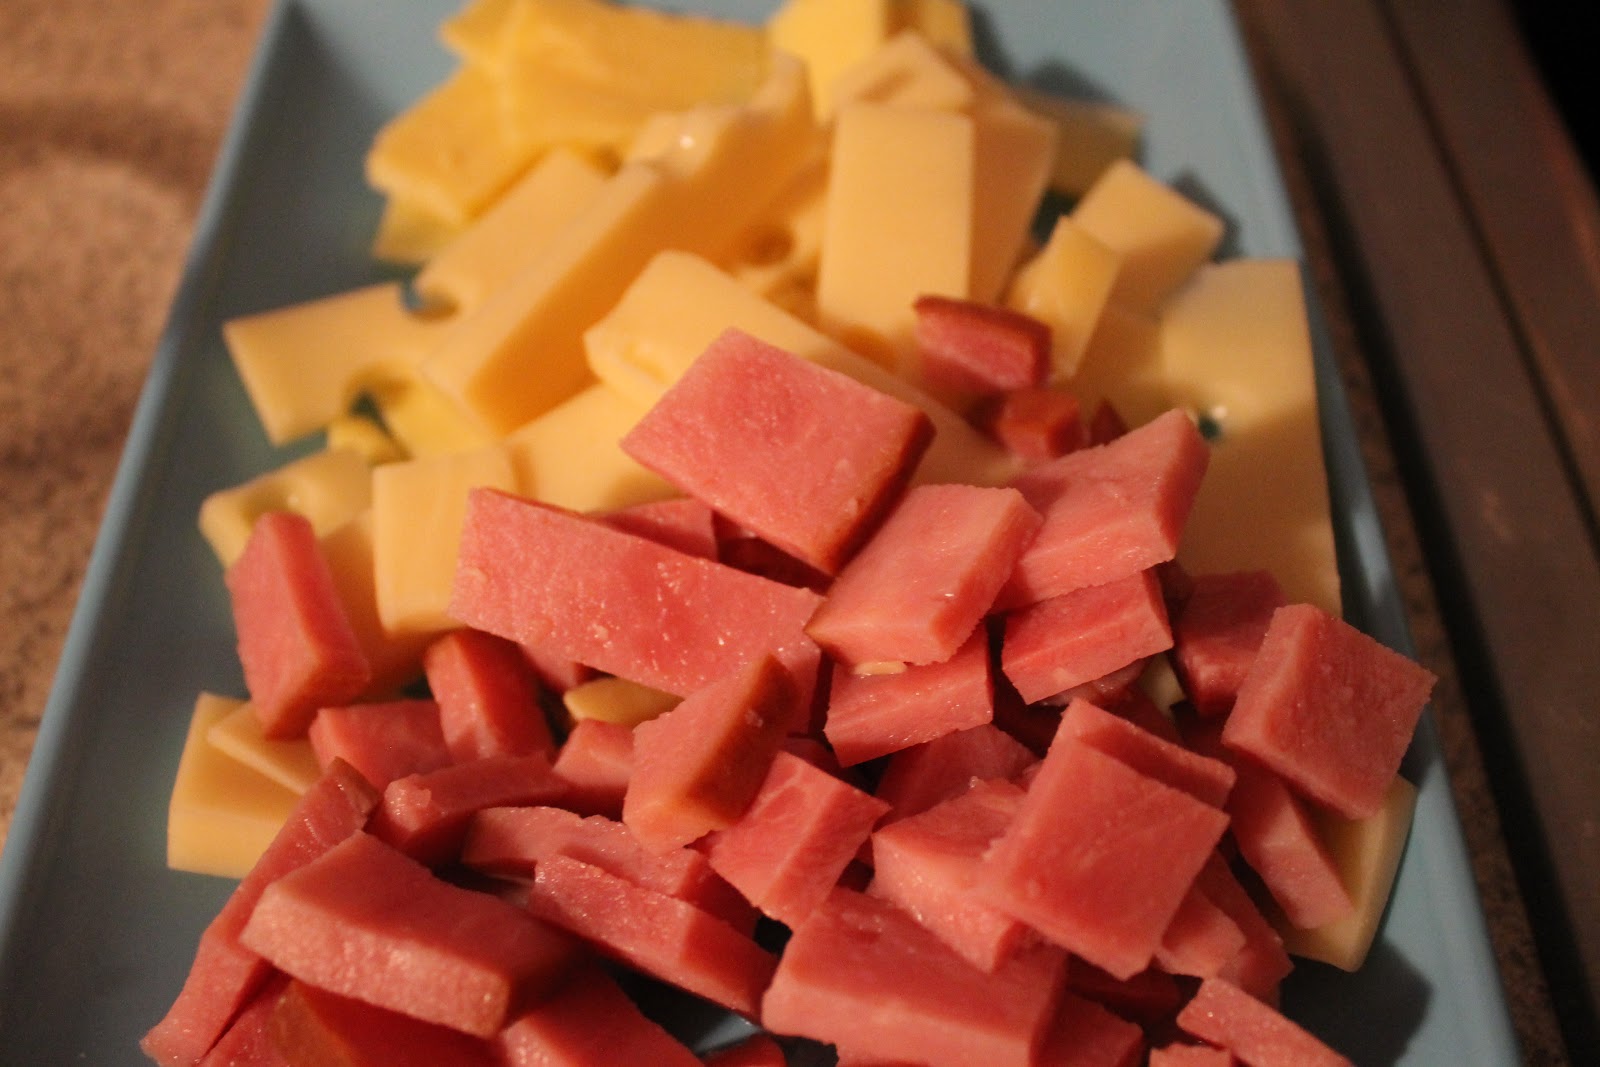 |
| Cut ham and cheese! |
 |
| Chicken pieces and soup mixture in my crockie. |
 |
| On goes the cheese and ham! |
 |
| Last layer! Stuffing! |
 |
| It's cooking up somethin' tastey! |
 |
| Oh, and it was so good! |
Easy Crock-Pot Sausage & Potato Stew
I'll usually never pass up a good deal on something if I know I will get some use out of it. Let me tell you about the most crazy deal I got the other day at Albertson's. I got 6 packages of Hillshire Farm Turkey Kielbasa Sausage for only $1 a piece! They are normally $5.99! Crazy right? They were on sale for $3 each, and then they had a $2 coupon to go with each one. I froze all of the packages and plan on taking them out as needed.
So, of course I had to find some recipes to make with kielbasa sausage. I called my mom to see if she knew of anything and she gave me this really yummy stew recipe that evidently my grandma used to prepare. Mr. M loved it so much that he ate 5 bowls of it. Yes, I did mean to write 5. It was super easy too. We made it the night before, kept it in the fridge, and put it in the crock-pot before I went to work and Mr. M when to school.
2 cans cream of mushroom soup
1 can green beans, drained
3 potatoes, cut in cubes
Kielbasa sausage, as much as you like :)
First spray your crock-pot with non-stick cooking spray. Dump 1 can of cream of mushroom soup into the crock-pot. Next put in all of the potatoes. We stirred it up a little bit to make sure all of the potatoes were covered with soup. Next add in the sausage and drained green beans. Stir a little more. Finally add the second can of cream of mushroom soup on top of everything. You can stir it a little, but not too much.
Cook on low for about 5-6 hours, or until the potatoes are done to your liking. We cooked ours for a little over 5 hours and almost all of the potatoes were done, there were just a few on the firmer side still. We just ate the stew by itself for our meal, but I'm sure it would be delicious with rolls.
Enjoy!
So, of course I had to find some recipes to make with kielbasa sausage. I called my mom to see if she knew of anything and she gave me this really yummy stew recipe that evidently my grandma used to prepare. Mr. M loved it so much that he ate 5 bowls of it. Yes, I did mean to write 5. It was super easy too. We made it the night before, kept it in the fridge, and put it in the crock-pot before I went to work and Mr. M when to school.
Sausage and Potato Creamy Stew
This recipe will fill a 1.5 quart crock-pot and heartily fed my husband and I. You can adjust the ingredients to make enough for what you need. It will taste just as yummy!2 cans cream of mushroom soup
1 can green beans, drained
3 potatoes, cut in cubes
Kielbasa sausage, as much as you like :)
First spray your crock-pot with non-stick cooking spray. Dump 1 can of cream of mushroom soup into the crock-pot. Next put in all of the potatoes. We stirred it up a little bit to make sure all of the potatoes were covered with soup. Next add in the sausage and drained green beans. Stir a little more. Finally add the second can of cream of mushroom soup on top of everything. You can stir it a little, but not too much.
Cook on low for about 5-6 hours, or until the potatoes are done to your liking. We cooked ours for a little over 5 hours and almost all of the potatoes were done, there were just a few on the firmer side still. We just ate the stew by itself for our meal, but I'm sure it would be delicious with rolls.
Enjoy!
Sweet Salsa Chicken
 Let me first tell you all how much I love using my crock-pot. I might be borderline obsessed with it really. It is just so simple and there is something about the slow cooking process that makes a meal so scrumptious. I also really love how I can prepare our supper at 1:30pm, clean up, get the dishes done, and just sit and relax until we eat. The beauty of only have a few dishes to do after we eat wins me over every time.
My very first recipe I am going to share with you all is one of our absolute favorites. We eat it almost every week and it might be the easiest thing you can make and yet it still tastes so delicious.
I got this recipe from one of my old college roommates. When she would make it I would beg her to let me have some... and she usually gave in. But in reality, I don't know why I didn't just make it for myself and eat the whole crock-pot.
So, without further adieu,
Sweet Salsa Chicken
This is the amount of ingredients I use when I make a meal for my husband and I, but if you need to make a meal for more people, just adjust the ingredients accordingly. It will turn out just fine!
 1 chicken breast
1 cup salsa
1/2 cup brown sugar
First spray your slow cooker with non-stick cooking spray. With something this small, I use my 1.5 quart crock-pot and it works great. Mix the salsa and brown sugar in the crock-pot.

Place the chicken breast in the crock-pot and try to have as much of it as possible be covered by the salsa mixture, even if it's just spooning some of it over the chicken. Let the chicken cook in the crock-pot until done, approximately 4-6 hours on low or 2-3 hours on high.

Once the chicken is fully cooked, take it out of the crock-pot and shred it. You may shred it however you like. I love to use my KitchenAid to shred our meat, it works perfectly! Just put on the whisk attachment and watch it shred right before your eyes. It usually takes about 1 minute or less.
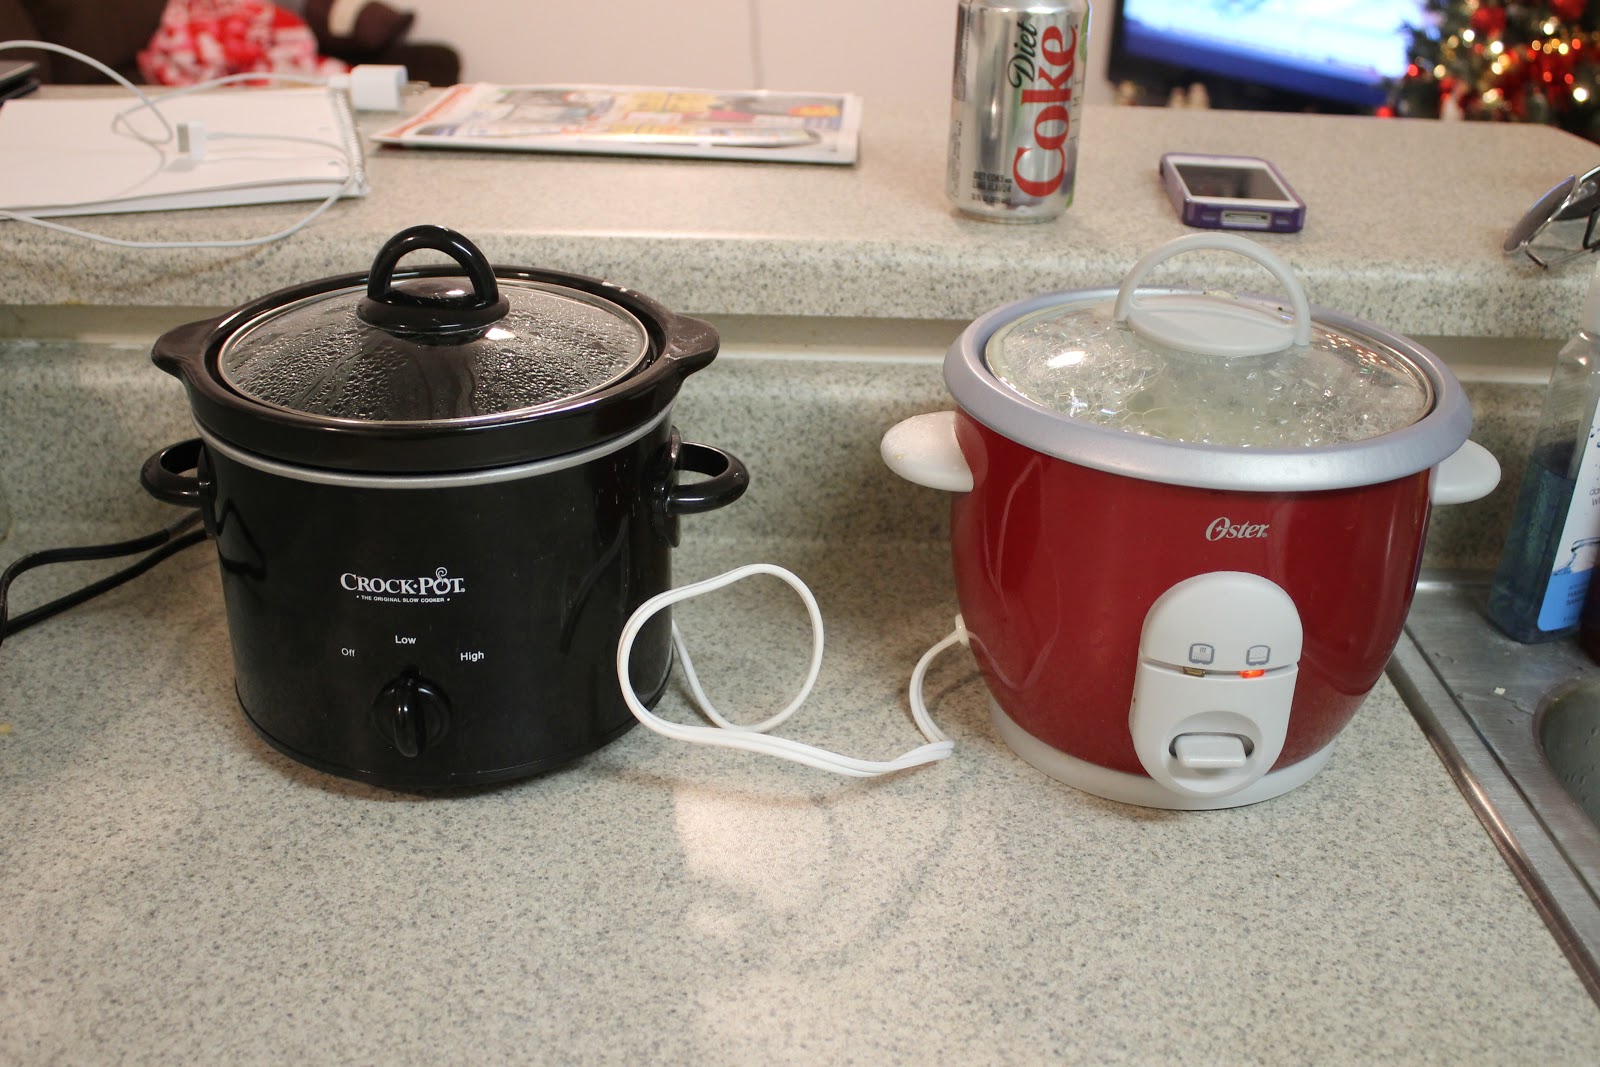 |
| Two of my favorite kitchen gadgets! My crock-pot and my rice cooker! |
After you have shredded the chicken return it to the crock-pot and continue cooking for at least 15 minutes.

We love to eat this over rice with cheese, salsa, and green onions on top. You may also eat it with tortillas as they make delicious chicken tacos!
Enjoy!!!
Subscribe to:
Posts (Atom)

